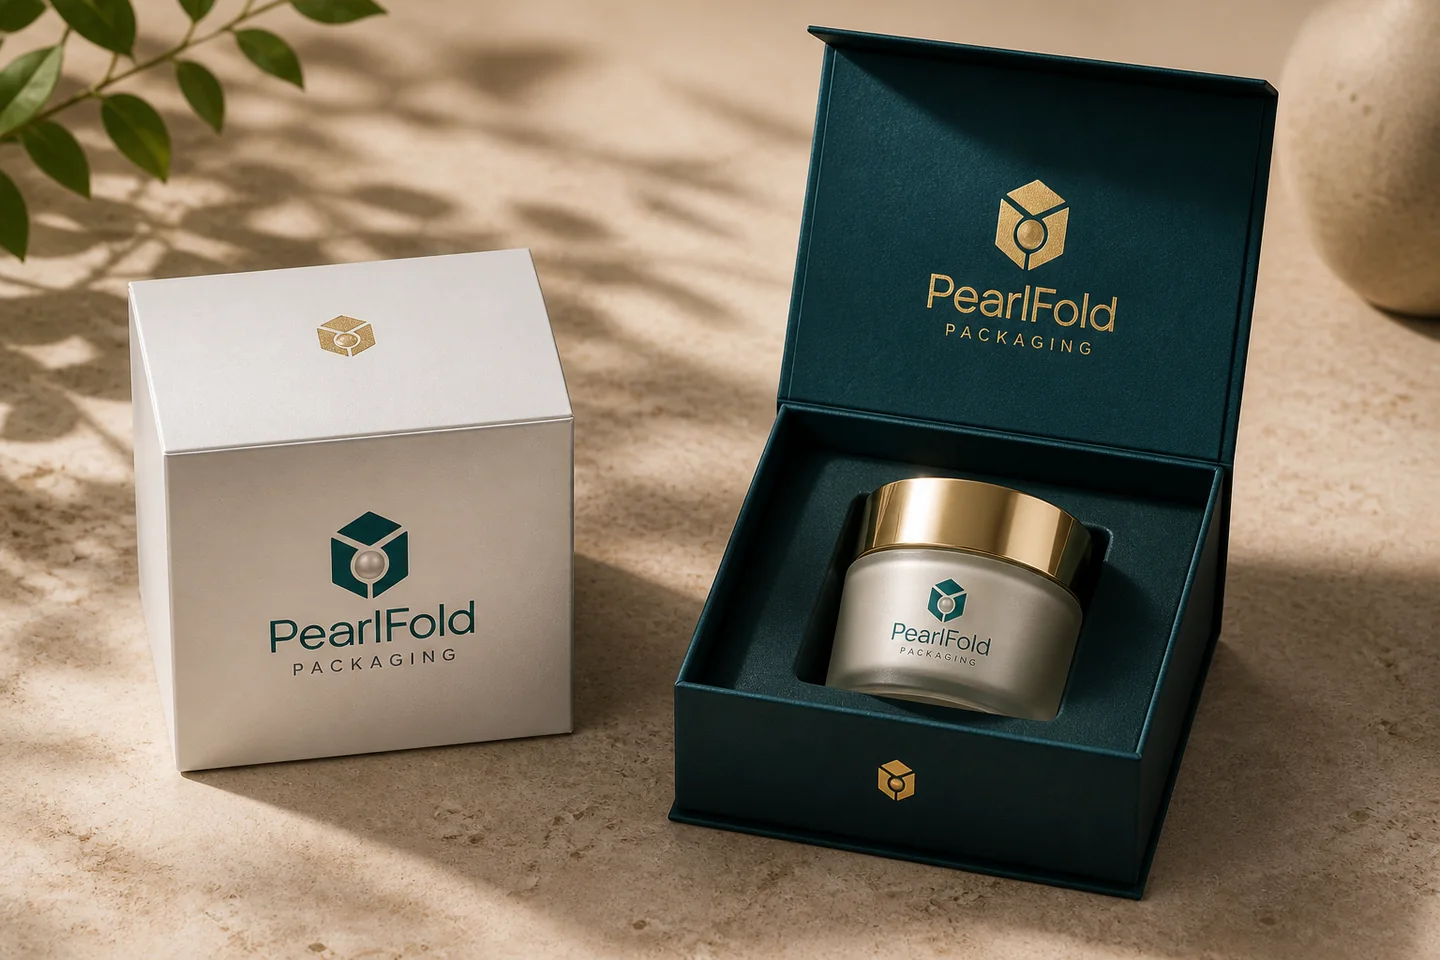
Custom packaging inserts control how a beauty product sits, moves, and is presented inside its outer box. An insert can protect a glass bottle, separate a multi-product set, create finger access, and organize the opening sequence. The right construction depends on the actual product dimensions, weight, fragility, surface, box style, packing method, and recovery goals.
Insert planning should begin with the finished product, not with a decorative cavity drawn around a rendering. This guide explains the decisions that make inserts useful and the evidence a brand should review before approval.
What does a custom packaging insert need to do?
An insert needs to locate the product consistently without making packing or removal difficult. It may restrain lateral movement, support weight, separate components, protect a closure, or establish a precise reveal. The required functions should be written before a material or visual style is selected.
Not every carton needs an insert. A well-sized folding carton may control a stable single product through its outer walls or folded geometry. An insert becomes valuable when the product has empty space around it, contains vulnerable parts, must stay in a specific orientation, or forms part of a presentation set.
Which measurements are required for an insert?
Measure the widest, deepest, and tallest points of the finished product, including pumps, droppers, caps, collars, applicators, and decorative shoulders. Record weight and identify surfaces that may scratch or show pressure. If several products share one box, measure every component and define the intended order.
Dimensions alone do not describe how a product behaves. A cylindrical bottle may rotate; a tapered jar may lift from a shallow cavity; a flexible tube may compress. Provide physical samples for fit review whenever possible. The sample should represent production intent, not an early container with a different cap or wall thickness.
How do paperboard, molded fiber, and other insert directions differ?
| Insert direction | Useful characteristics | Questions to review |
|---|---|---|
| Folded paperboard | Printable, foldable, and compatible with many carton systems | Does the fold pattern control the item and pack efficiently? |
| Layered paper structure | Creates depth and a clean framed presentation | How much material and assembly does the geometry require? |
| Molded fiber | Forms shaped cavities and can communicate a tactile paper direction | Are surface, tolerance, tooling, and documentation suitable? |
| Foam or other specialist material | May support precise retention or a particular presentation brief | Are performance, recovery, and claim implications documented? |
Material choice should follow the fit and project requirements. Avoid treating one option as universally sustainable, protective, or premium. Ask for the applicable specification and evidence for the exact construction being quoted.
How should finger access and product removal be designed?
A product that is secure but impossible to remove has failed the user experience. Finger notches, pull tabs, ribbons, side clearances, and lift points should be planned around how the customer approaches the item. The access feature must not expose a fragile edge or allow the product to release unexpectedly.
Review removal with different hand sizes and with the box on a realistic surface. A rendering cannot show grip, friction, or the force required. Sampling also reveals whether a ribbon disappears under the product, a notch is too shallow, or a snug cavity scuffs the primary container.
How do inserts affect the opening sequence?
An insert establishes what appears first, which item leads, and how secondary components are discovered. For a serum set, the bottle may be centered with an applicator beside it. For a fragrance discovery set, repeated cavities may create rhythm. For a gift set, a second layer may be appropriate only if the customer can understand how to reach it.
Keep the sequence legible. Too many compartments, decorative voids, or hidden layers can make a set feel complicated and larger than necessary. Product spacing should look intentional while respecting the outer box, packing method, and transit protection.
What should be checked during an insert sample review?
- Product orientation and movement when the closed box is handled
- Pressure on caps, pumps, glass edges, labels, and decorated surfaces
- Finger access, lift path, and return of the product to the cavity
- Insert movement inside the outer box
- Packing sequence and whether assembly is clear
- Visual alignment when the box opens
- Material surface, edges, folds, and visible gaps
- Compatibility with the approved outer-box dimensions
Document the sample version and product version together. If the primary container changes, repeat the fit review. A small change to a shoulder, cap, or label can affect the cavity even when the nominal volume stays the same.
How can an insert avoid unnecessary material?
Begin with the smallest practical outer footprint and use structure only where it performs a clear task. Large decorative borders and deep unused cavities can increase material and shipping volume without improving the product experience. A compact, well-positioned product often feels more considered than an oversized presentation.
Ask whether each layer protects, locates, separates, communicates, or improves removal. If a component serves none of those functions, test a simpler direction. Material reduction still has to preserve the approved fit and pack-out process; it should not be claimed from appearance alone.
What information belongs in an insert brief?
Supply product samples or confirmed dimensions, weight, orientation, fragile points, desired reveal, outer-box direction, approximate quantity, sales channel, and material preferences. Identify any supplied sustainability or compliance requirement and attach the evidence available to support it.
Explain how the box will be packed and whether the insert arrives assembled. If multiple SKUs use the same outer box, state which products share a cavity and which require distinct versions. This prevents a visually coordinated range from hiding a poor product fit.
When is a custom insert worth adding?
Add an insert when it solves a defined problem: movement, protection, orientation, multi-product organization, removal access, or presentation. Do not add one only because premium boxes in reference images contain inserts. The package should be justified by the product and buyer experience.
Review PearlFold’s custom inserts capability guide for the full planning process. If the product, dimensions, quantity, and outer-box direction are ready, request a custom packaging quote and include photographs or a physical sample reference so the insert can be discussed as part of the complete specification.
How should an insert be reviewed with the outer box?
The insert and outer box form one structure. Check whether the insert can shift, bow, lift, or expose an edge when the box is closed. Review the relationship between lid depth, insert height, product projection, and any interior print. A tray that looks correct outside the box may interfere with a closure or create pressure once the complete package is assembled.
Confirm the pack-out order as part of the review. Some folded inserts need to be erected before they enter the box; others can be placed flat and formed during packing. The correct sequence affects labor, consistency, and the risk of damaging decorated surfaces. Write the agreed process into the specification instead of leaving it to interpretation.
Can one insert serve several SKUs?
One insert can serve several SKUs only when the controlled dimensions, weight, and removal path remain suitable for each item. A shared bottle family may look identical while using different caps, collars, or label thicknesses. Test the largest and smallest production-intent versions and record the acceptable product set.
If one cavity is made loose enough to accept every item, check whether the smallest SKU moves too much. A modular insert, paper collar, or separate version may produce a better result than one compromised geometry. Visual consistency across a range should not replace product-specific fit.
How do shipping and handling affect insert decisions?
The presentation package is only one layer of the delivery system. Review how it sits in the shipping carton, what orientation it experiences, and whether void fill or dividers are part of the plan. An insert that holds the product during a tabletop opening may behave differently under repeated handling.
Use testing appropriate to the project and sales channel rather than making a universal performance promise. Record the package configuration used in the review, including the outer shipping materials. If the shipping pack changes, reassess the complete system.
What should be documented after insert approval?
Retain the approved dieline or tooling reference, material specification, product sample version, cavity orientation, assembly method, outer-box version, and photographs of the accepted fit. Note any permitted tolerance or substitution only when it has been formally confirmed.
This record helps future repeat orders and SKU additions begin from evidence. It also prevents an approved appearance from being separated from the construction that produced it. A premium reveal is repeatable only when the structure, materials, and pack-out are controlled together.
Before release, ask one person unfamiliar with the concept to open, remove, and replace the product without coaching. Observe where the person grips the package, which item they see first, and whether any step feels uncertain. That simple usability check often identifies access or sequence problems that a technical drawing cannot show.
Record the observation and any resulting structural change with the approved insert version.